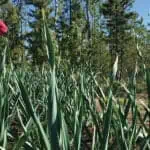
Are you sick of buying the bland garlic that comes from overseas? Do you seek out the nice rosey BC garlic when it occasionally makes its way into our grocery stores? Then it’s time to grow your own garlic. It’s possible here in the Yukon to plant a clove in the spring and have a beautifully cured bulb by mid August! We’ve tried a couple of different ways and found that the following works for us. Garlic is a rewarding plant to grow and fun to show off.
Planting
One fun fact about garlic is that it does not produce true-seed; it is sterile. It is reproduced vegetatively (similar to potatoes) by harvesting and planting the cloves from the parent plant. There are two types of cultivated garlic (Allium sativum): hardneck garlic and softneck garlic. They can be differentiated by the stiffness of the stalk growing in the center of the cloves. Imported garlic is typically of the softneck type whereas domestic garlic production is largely hardneck. Hardneck varieties such as ‘Music’ are cold-hardy, make large cloves, have great taste, and store well.
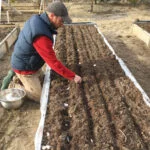
In warmer climates hardneck garlic is planted around Thanksgiving and harvested the next summer. Up here the winter is too cold and the spring freeze/thaw cycle too harsh to do that successfully. We try to get our garden bed ready in the fall so that we can plant our cloves in the spring as soon as the snow has melted and the ground is not frozen. We aim for early April. Raised beds help as the soil warms up faster in the spring. Break your bulbs apart into cloves shortly before planting and make sure to leave the skin on! This is called ‘cracking’ the garlic.
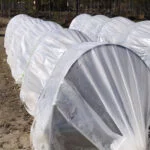
Plant the clove, pointy side up, about 2” below the soil surface. Plant cloves 6” apart and rows a foot apart. We build a plastic low-tunnel over our beds and this heats everything up a bit more and gives the garlic a boost. We take the plastic off once the garlic is 4-6” tall and it’s warmer outside.
Watering
Garlic is not a plant-it and forget-it vegetable. It needs regular watering throughout its growing season. If they don’t get enough water, you’ll end up with smaller bulbs. It’s important to stop watering a couple of weeks before harvesting. Too much water at the end prolongs the drying and curing stage.
Removing Scapes
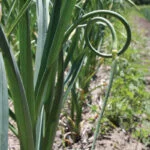
Hardneck garlic produces a long, hard stem with a spear-shaped flower at the end called the scape. It starts to grow loops and once there are 1-2 loops it’s good to snap these off. It lets the plant put its energy into producing a bigger bulb. Garlic scapes taste great, I love cutting them up and putting them into a stir-fry or making a pesto out of them.
Harvesting
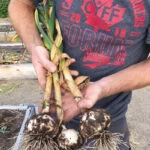
It’s time for the most exciting part, the harvest. Your garlic is probably ready to harvest if the scapes were removed 2-3 weeks earlier and the bottom 4-6 leaves have turned brown. Loosen soil with a shovel and pull straight up on the lower stem. If you leave your garlic in the ground too long, it will start rotting. Once you’ve harvested your bulbs, loosely brush off the dirt and tie them together with string in bunches by their leaves. We put 10 bulbs in a bunch. Hang them somewhere warm and breezy but protected from the rain and direct sun. Good air circulation is important. It takes about 2-3 weeks for them to cure and the wrappers to dry. Our covered deck serves us well.
Storing
When the garlic is cured, it’s time to remove the tops, leaving 2-3” of stalk. Then peel off any dirty wrapper leaves and trim the roots if you like.
We store our garlic in mesh bags in our basement. It’s a bit cooler than room temperature and relatively dry. Garlic that is well-cured should last over the winter. We were enjoying our last cloves in April!
Planting and harvesting garlic is very satisfying and not as difficult as you may think. Make that bland garlic a thing of the past!

